Any home would benefit from having a deck because it adds more area for socializing, relaxing, and outside activities.
Garden decking that has been properly polished can be elegant and lovely. It is the first thing you will consider when you walk into a home’s outside space, whether stained, oiled, or painted.
You’ll more often than not find yourself outside as the summer blooms, appreciating your investment for what is a delightful place to decompress.
Clean out dirt from your deck before you begin, and cover nearby plants. Put on a ton of strippers and work in manageable chunks. Avoid painting yourself into a corner; the surface will be slick while it is working. You shouldn’t be concerned if you can’t see anything occurring because it doesn’t blister or fizz when stripping. Scrape it with anything like a pallet knife after 30 minutes.
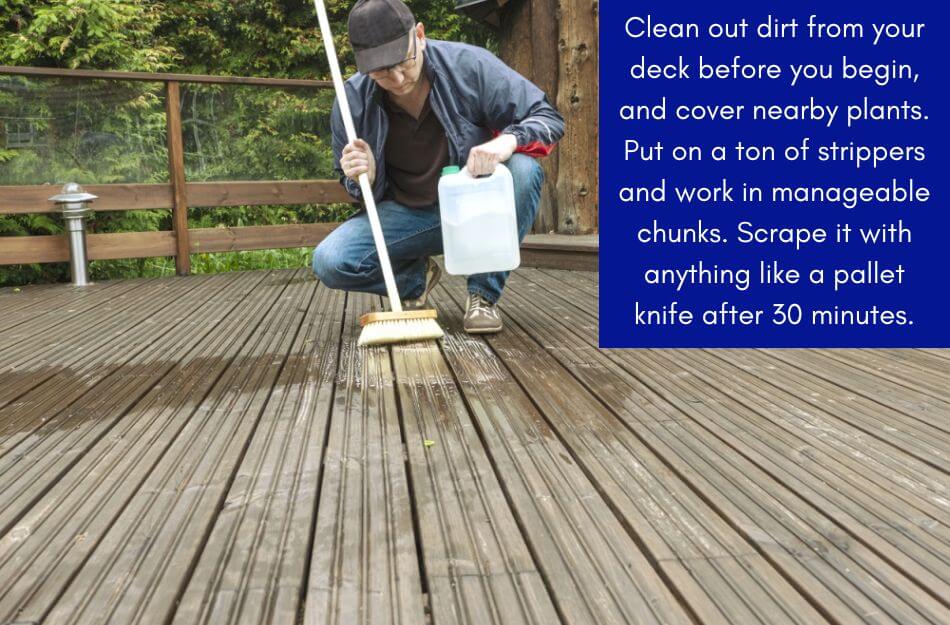
You’re ready to scrub when it comes off readily. Scrub the deck planks thoroughly from bottom to top. That will immediately loosen the oil or stain.
Pour more water onto the surface and give it another thorough brush to get it all off. It can now be thoroughly washed down before being allowed to dry.
Though only some things are rosy and sunny, your finish is susceptible to damage from foot traffic, sun damage, weathering, and simple wear and tear if it is not properly maintained.
Usually, very forgiving, oil-coated decking can be repaired with just a small patch job. But it can be a whole different story with painted and varnished surfaces.
The finish may begin to peel, flake, or crack with time. Sometimes decking that needs serious repair is left behind for new homeowners.
The only option in situations like this is to begin again. In preparation for refinishing, this blog post will demonstrate how to strip your decking down to bare wood.
A little time and work are needed for this very simple technique.
Table of Contents
- 1 What is Deck Stripping?
- 2 Types of Stripers
- 3 How To Strip Decking Back To Bare Wood
- 4 Use a Pressure Washer to Strip and Clean Your Deck Before Staining It
- 5 Sanding vs. Stripping
- 6 Use Heat Gun To Remove Old Paint
- 7 Removing Wood Lubricants From Deck
- 8 Can you Refinish a Deck Without Sanding?
- 9 Do I Need to Strip the Deck Before Staining?
- 10 Why Do You Strip a Deck?
- 11 Conclusion
What is Deck Stripping?
Deck stripping, as the name implies, is a technique for returning the wood to its natural state by removing oils or stains.
They also have the added benefit of eliminating wood grain tannins, mold, mildew, algae, other organic components, and coatings.
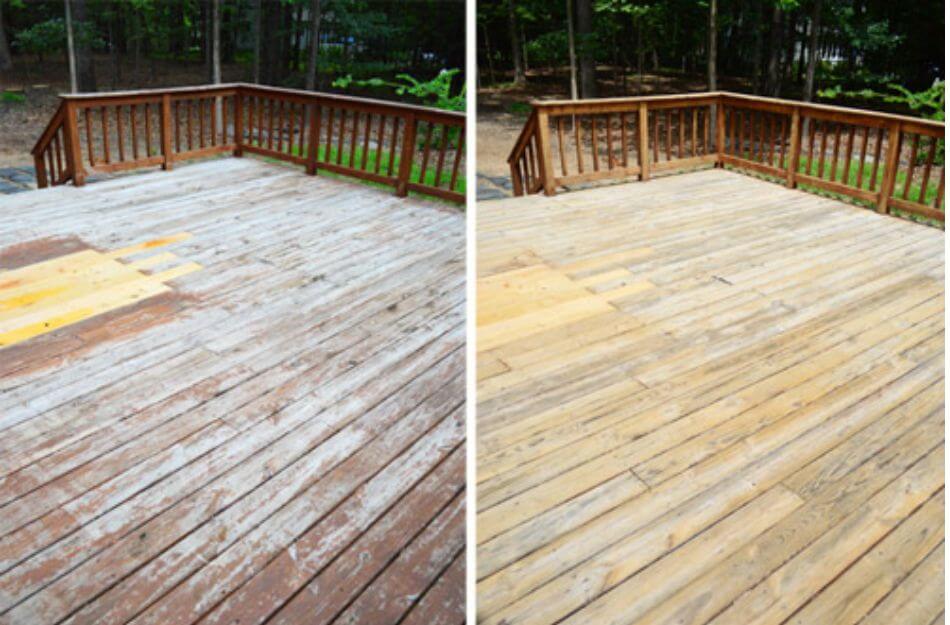
With this technique, the existing finish on decking or other outdoor wood surfaces is stripped or removed using chemicals.
With a chemical stripper, you benefit from a product that serves as both a stripper and a deep cleaner. To remove old stains, a deck stripper must delve deeply into the wood, opening the pores.
It creates a fantastic foundation for when you want to give your deck a new coat of stain. By soaking deeper into the wood grain, the stain will be more uniform and provide a long-lasting finish.
Compared to sanding, stripping is a significantly faster method and requires less effort, lowering your labor expense.
Compared to conventional paint removers, which are more costly and emit more hazardous fumes.
Types of Stripers
While strips are of different types and choosing the right one for your deck is essential. Therefore we have listed these stripers below. Have a look at them.
Solvent Strippers
Compared to sanding, solvent strippers work far more rapidly and with less effort.
They won’t harm the wood; like all chemical strippers, they will remove the finish into the grain, leaving the wood perfectly clean. Solvent strippers’ main drawback is their high cost; the bigger the deck, the more expensive they are.
Additionally dangerous are strippers; if the solvent comes in contact with the flesh, it can burn painfully. Steel wool will still be required to remove unattractive leftovers after at least two layers of stripper.
Caustic Strippers
Caustic strippers won’t get as far into the deck as solvent strippers, but they are less expensive. Before scraping can start, they must be allowed many hours to remove the finish completely.
Caustic strippers are slightly safer than solvent-based ones since they produce fewer fumes but can still result in burns.
You should be aware that salt may accumulate once the wood has cured and that residue needs to be removed using white vinegar.
Although they frequently take numerous applications, caustic strippers work best to remove multiple coats of finish from deck wood.
How To Strip Decking Back To Bare Wood
We will all want to spend more time outdoors as the weather warms up. Refinishing your deck is a terrific way to update your backyard oasis, so today, we will walk you through the stripping process.
The initial step in refinishing a deck is removing all previous finishes. It will guarantee even application of and long-term durability of your new finish.
The following instructions will show you how to strip your deck down to its bare wood:
Removing Your Old Deck Coating
Deck stripping is a messy task. In most cases, strippers are gel-like compounds that rest on the previous covering (such as stain or paint) and soften it.
The finish beneath that gel is then scraped off. The old coating should ideally rinse off. It is frequently necessary to scrub, scrape, and reapply the stripper over difficult-to-reach regions.
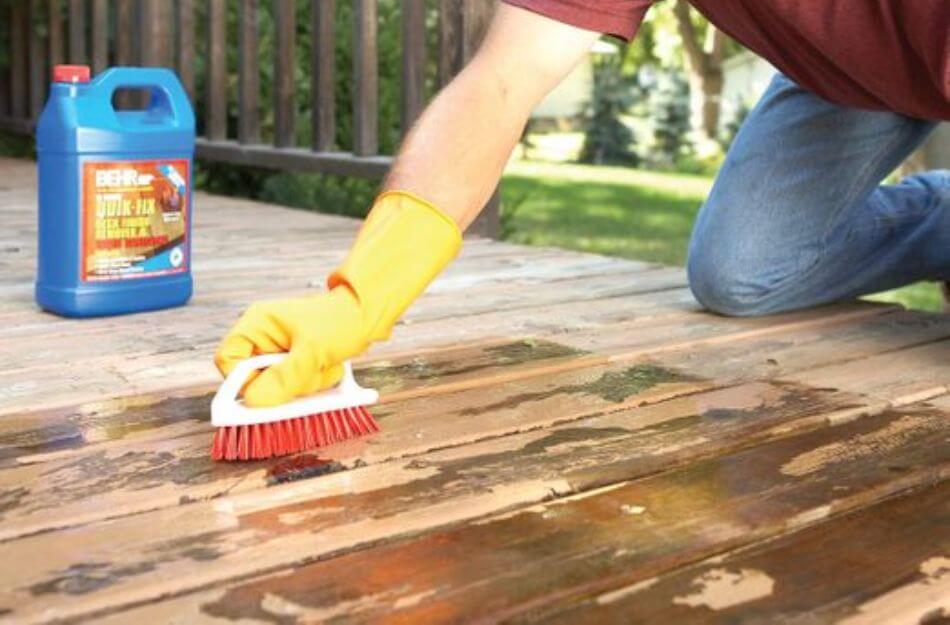
Old stains can be removed with some strippers, while others (like the one we use today) can be used on either paint or stain. Pick a stripper who can meet your needs.
Keep in mind that while a stripper will remove a covering from wood, it won’t bring the wood back to its original state.
After your diligent labor, you will notice a noticeable improvement. Still, the wood you started with (with or without its flaws) will remain.
There might have been a valid reason why a former tenant or owner painted over your deck planks.
Here is a fast rundown of the six steps for removing the finish from an old deck, porch, stairs, or railings. Depending on the size of your deck, it can be finished in a day or even throughout the weekend.
Tools & Supplies To Strip Your Deck
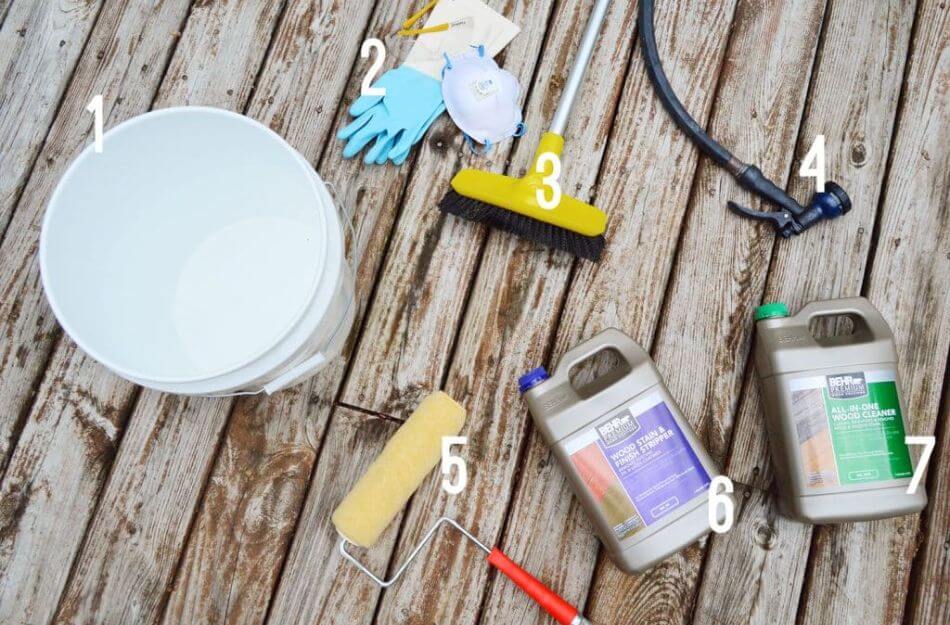
The supplies we gathered to remove the deck’s previous finish are listed below:
- Bucket to easily dip my roller by pouring the stripper into it
- Safety equipment, including rubber gloves, glasses, and a mask (this stuff STINKS)
- A Pole-Handled Stiff Bristle Brush
- Hose
- Nap paint roller with the extension pole
- bottles of the Wood Stain & Finish Stripper
- Pump Sprayer
Prep Your Deck
Reading the product’s instructions is the first step in any successful project. The deck boards have a thick, paint-like stain on them, so the label on the Peel Away stripper that we’re using to remove some finishes advises applying it full strength.
It would help to prepare your deck area after reading the instructions for utilizing your stripper. Typically, this entails shielding nearby flora and covering objects the stripper shouldn’t touch, such as glass or metal railings.
Since there may be drainage between the deck boards, the area underneath your deck boards might require to be covered.
You may find out what equipment, such as scrub brushes, protective gloves, and eye protection, you’ll need by reading the directions on your stripper.
Pour the stripping agent into an empty garden spray after gathering your tools and preparing the work area.
The Deck Should Be Stripped
Spray the stripper freely onto your deck’s surface and let it remain there until the stain is cleared. It typically takes five to fifteen minutes.
The coating will weaken, giving away when the paint or stain begins to lift.
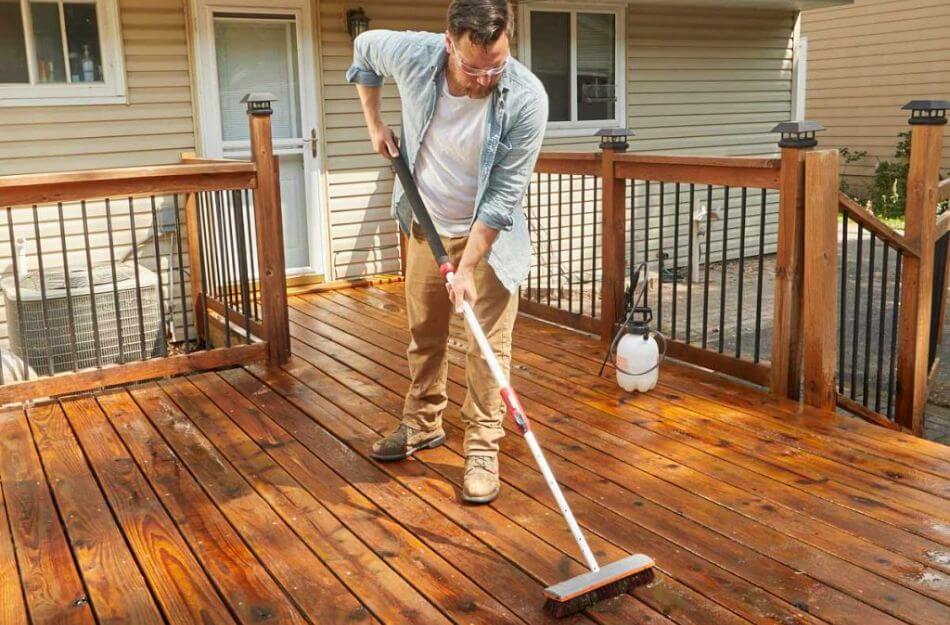
Allow the stripper to remain on your deck for however long is necessary, but keep the solution from drying out. Apply a bit more to keep the surface moist if it begins to dry.
Notably, some decks had a fresh, solid-color coating, which made lifting it take longer than 15 minutes.
Remove Any Paint or Stains
Use a sharp brush or power washer to agitate the surface and scrape off the previous covering after visibly lifting it.
The task is labor-intensive while using a brush but less so when using a pressure washer.
Make sure to not use the power washer excessively; limit the pressure to no more than 1000 PSI. That pressure will enable you to remove the old covering as it sheds without harming the underlying wood.
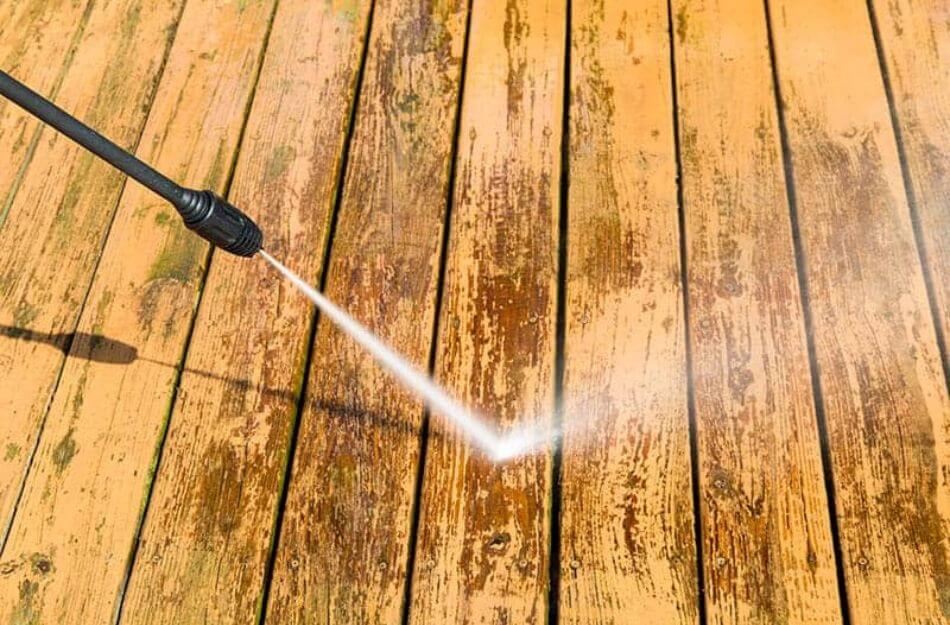
In an ideal scenario, everything would rinse off and dry before you applied a fresh finish. But there are flaws in this universe.
The vertical crevices between deck boards often become dripped with deck stains and paint.
Additionally, you should brush or scrape the area around balusters, railing posts, or other fine details. It will take additional time and work if the previous coating needs to be removed from certain locations.
Rinse And Let Dry
After removing the previous coating with a brush or a power washer, clean your deck with water and let it air dry.
You’ll see that the surfaces of the boards we removed still retain a hint of green. You would need to repeat the stripping procedure to remove all the wood.

Ensure the wood is stripped to the bare minimum if you intend to stain your deck a color lighter than the coating you removed to prevent the previous coating from showing through.
A darker stain may cover the remaining previous layer if you’re repainting.
It is advised to use a brightener/neutralizer after stripping your deck. By balancing the pH of the wood, the substance will enable the new deck finishes to adhere.
The treatment will also give the wood a brighter appearance, partially restoring its original color.
Use a Pressure Washer to Strip and Clean Your Deck Before Staining It
Your deck may have seen better days. Do you wish you could demolish it and build something stunning instead?
The good thing is that you can still have a deck you adore without doing this. You can get the brand-new look you want for much less money by simply sanding it down and staining it.

But a lot of individuals are wary of this choice. They believe it takes the same amount of time and money as simply building a new deck.
Contrary to what you would think, pressure washing simplifies stripping your deck.
Continue reading to find out how pressure washing can be the most effective approach to remove mold, mildew, old paint, wood stain, and embedded dirt from your deck.
The Procedure of Using a Pressure Washer To Strip the Deck
You need the correct pressure washer first. For the typical deck, we advise 2400 PSI. It simplifies the task without harming the majority of woodlands.
Start by removing loose leaves, dirt, and debris with the spray tip. Once you’ve switched to a chemical tip spray, use your preferred cleaning solution to clean the deck and any nearby fences.
Finish by applying a final layer, then wait a short while to dry into the deck’s wood. You should deep clean your deck with a narrower spray if it is dirty.
Then make a stroking motion with your wand. It will assist in removing any mud, paint, or grime.
But avoid direct spraying. We advise stroking since the zero-degree angle may result in lines shaving into the wood.
After that, give the deck a thorough rinse with clear water.
Sanding vs. Stripping
Decking can be stripped or sanded to remove a coating and reveal the bare wood underneath.
Both methods are frequently employed to remove the undesired finish off decking or other wooden surfaces, particularly when multiple coats of finish have been put over the years, and the woodgrain is no longer visible and seems painted.
Due to the conditions that can be employed in conjunction to improve results, both types of deck finish removal tasks are still in demand.
While both have benefits and drawbacks, deck restoration is generally a difficult project that requires high-quality tools and supplies.
In general, mechanical sanding is considered an old method of deck restoration. In contrast, deck stripping and optional light sanding are new methods that DIY enthusiasts often disregard because they are considered risky.
It may have been true in the past, but not as the deck restoration industry advances with new deck strippers and cleaners.
What Do You Choose?
As mentioned, the situation and state of your wood can affect whether you should sand or strip it. The amount of time, effort, and resources you have to complete the task also plays a role.
Before deciding, remember that a stripper is frequently a better option for larger decks. At the same time, sanding is an option for smaller decks.
While a deck sander can do a thorough job in a few days, a stripper is quicker, less expensive, and more effective because it removes wood tannins and organic materials from wood deeply.
Because sanding only removes the top finish layer, washing the deck with the appropriate deck cleaners is still strongly advised.
You can choose which is preferable by quickly weighing the costs, benefits, and desired outcomes.
Use Heat Gun To Remove Old Paint
Old paint layers bubble off a wooden surface when a heat gun fires a stream of hot air. While using a heat gun to remove paint is quicker and cleaner than using a chemical stripper, heat guns still produce hazardous fumes and can damage wood surfaces.
Keep a metal paint tray handy when using a heat gun so you may set it down there when finished (and never leave a hot gun unattended).
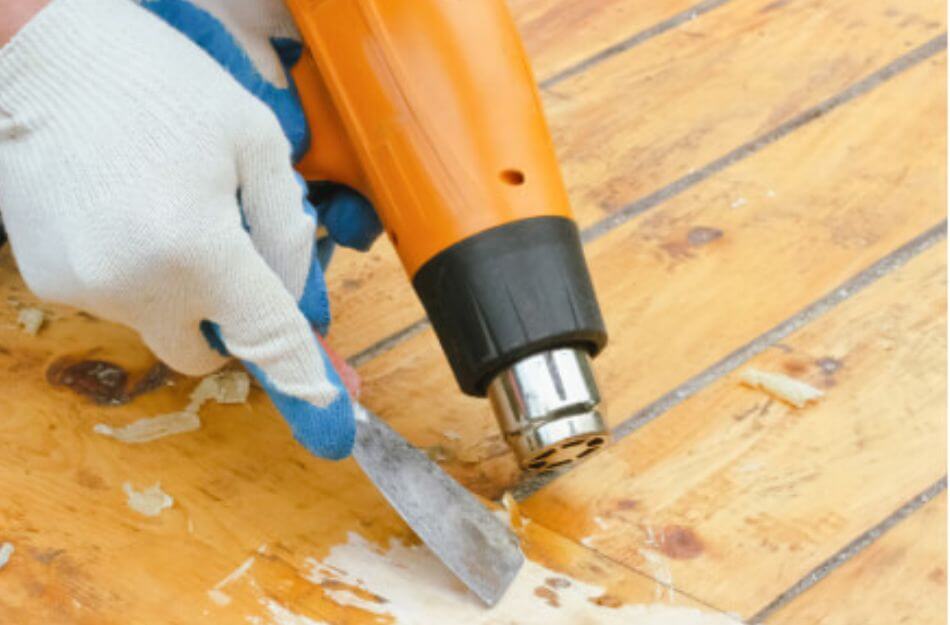
Wear the proper safety equipment, including heat-resistant work protective gear such as gloves, protective clothing, and a respirator mask.
Ensure that a fire extinguisher is nearby as a precaution.
- Start the heat gun, then spread it over a small area. When the gun has heated up, move it back and forth over a small area while holding it two inches away from the painted surface until the paint begins to bubble. Don’t hold the gun still for an extended period to prevent the paint finish or your wood from burning.
- Use the hand opposite your own to scrape the paint off. Remove the loose paint layers with your other hand by holding a metal paint scraper at a 30-degree angle and using little pressure. A natural flow of scorching and scraping should be developed. Overscraping puts the wood at risk of being gouged.
- Repeatedly scrape any tough places with the heat gun. Use a smaller contoured scraper to access detailed or narrow regions on your wood surface.
- Clean the area. Once the paint has been removed, use a soft cloth dipped in mineral spirits to wash the entire surface.
Removing Wood Lubricants From Deck
We firstly advise that you strip any wood oils from your wood using a cleaning solution, whether teak oil, linseed oil, or any wood oil.
Use a solution that has a gel formulation, making it simple to apply, and it is specifically made for eliminating wood oils.
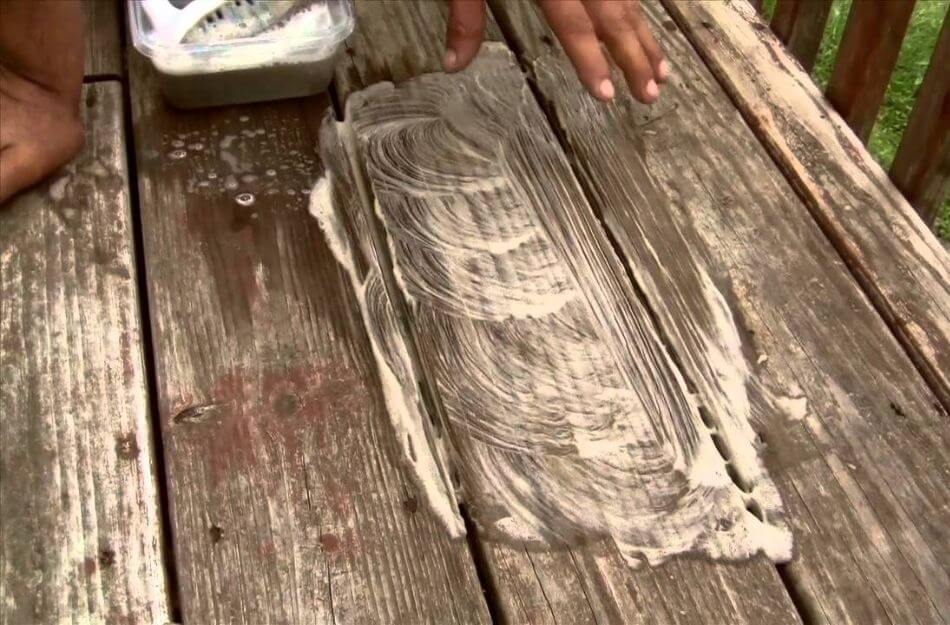
Suppose you want to use a solution to remove wood oils from your deck. In that case, you must apply it, give it a maximum of five minutes to work, and then scrub the surface while rinsing with the greatest water pressure source you can access.
To stop the stripper from staying active in the wood, you must neutralize the wood.
Can you Refinish a Deck Without Sanding?
In most cases, sanding is unnecessary to prepare a wood deck for a fresh coat of deck stain. Cleaning the deck, removing the old deck stain, and applying a wood brightener are the best ways to apply new stains without sand.
The deck should receive one last rinse before the new stain is applied.
Do I Need to Strip the Deck Before Staining?
Oil-based stains can be recoated after using a deck cleaning. However, water-based stains must be cleaned before applying a new finish.
To check for stains: On a small section of your deck, apply a small amount of deck stripper.
Why Do You Strip a Deck?
When brand-new, solid-color stains protect wood decks and look beautiful, even the best solid-color deck stain ultimately wears off and flakes.
Before recoating the deck, they must first be scraped and taken off.
Conclusion
While protecting a deck from the elements is crucial, putting a stain on a dirty surface might exacerbate the situation.
Before applying a deck stain, the wood should be clean and free of debris, mold, mildew, graying, and any previously failed stains.
The new stain will sink into a clean, bare wood surface, providing the promised performance and protection.
When used on a spotless surface, a stain not only offers protection but also helps to bring out the beauty of the wood, producing a gorgeous finish.
Before you strip your deck, it’s crucial to understand the state of the wood because not all decks require the old coating to be removed.
Stripping is necessary if you’re lightening the opacity (for example, changing from a solid to a semi-transparent finish) or making a significant color change.
The same holds if the surface has undergone extensive weathering and the prior coating has cracked or blistered.
The practical benefit of strippers is that they will melt and soften most stains, making it simple to wash or wipe them away.
Deck Strippers also remove mildew and graying from surfaces. Afterward, there is no need to use a cleaner.
Recent Posts
Although deck sealing may not be at the top of your summer to-do list, you shouldn’t put off a task.One such deck that channels the opposite of the lively and enjoyable vibe you want from an...
It's time for spring cleaning, and while many homeowners focus on the scratched baseboards, the dust bunnies, and the smudged picture frames around the house, it is important to remember the deck....
